One cockpit for every Codex account.
Switch accounts before limits hit. Pool quota for other apps. Control every Codex window locally.
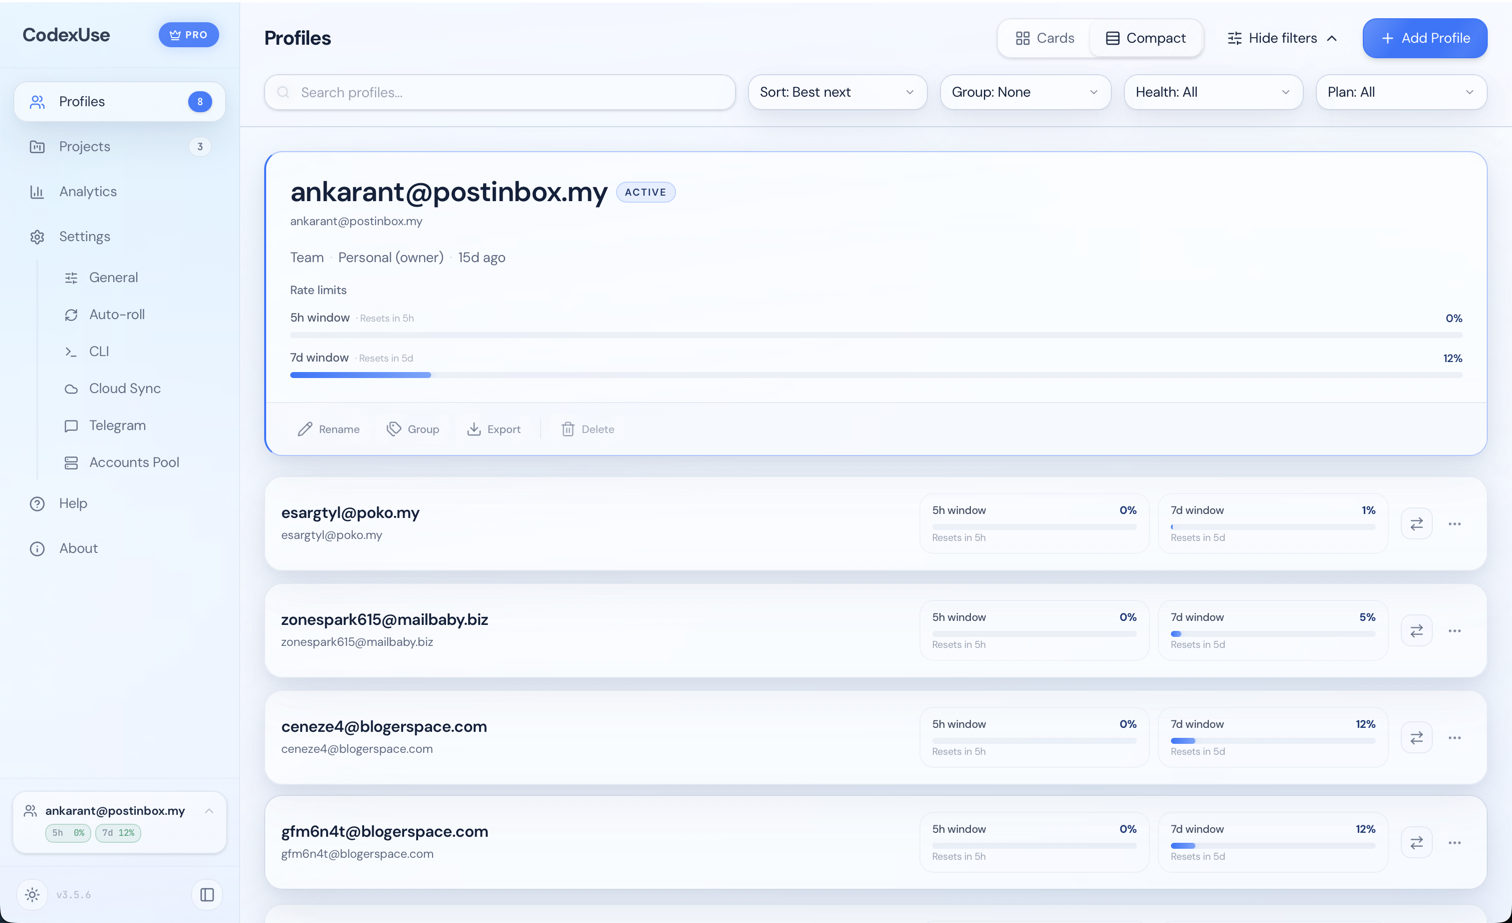
Run Codex from one local cockpit
Codex App control and instant account switching are built in. Accounts Pool turns selected profiles into one local API when another tool needs shared quota.
Jump straight to your bottleneck
Pick the guide that matches the work blocking you now.
The whole cockpit, from your terminal
List profiles, switch accounts, manage Accounts Pool, and sync profile data without leaving your terminal.
- Fast profile switching with
codexuse profile switch. - Manage Accounts Pool settings and runtime keys from the CLI.
- Device auth for headless and SSH by default, plus encrypted manual cloud-sync handoff.
- Keep a second machine ready with encrypted cloud sync and profile switching.
Try everything free for 7 days.
Every install unlocks the full app for 7 days: unlimited profiles, auto-roll, Accounts Pool, MCP and Skills. Keep it all with one payment.
No subscription. Your local profiles stay on your machine if the trial ends first; Pro unlocks them again.
Straight answers
The switching, install, and upgrade questions that come up most, answered plainly.
Releases
Latest build, what changed, and the fastest install path for Apple Silicon macOS.